
Label Studio
Learn how to use the Label Studio integration to ingest data.
Label Studio supports many different types of data labeling tasks, while Pachyderm allows you to incorporate data versioning and data-driven pipelines, enabling the management of the data loop. This integration connects a Pachyderm versioned data backend with Label Studio to support versioning datasets and tracking the data lineage of pipelines built off the versioned datasets.
Before You Start #
- You must have a Pachyderm cluster deployed.
1. Deploy Label Studio #
The following one-liner will map your local configuration into the container to connect to Pachyderm. If you are performing another form of authentication, then you may need to use the entrypoint /bin/bash to configure the container before running /usr/local/bin/label-studio.
$ docker run -it --rm -p8080:8080 -v ~/.pachyderm/config.json:/root/.pachyderm/config.json --device=/dev/fuse --cap-add SYS_ADMIN --name label-studio --entrypoint=/usr/local/bin/label-studio jimmywhitaker/label-studio:pach2.2-ls1.4v3
Once running, we can access label studio by visiting: http://localhost:8080/.
Once we create a user, new project , and select our labeling task (in our case we’ll use the “Object Detection with Bounding Boxes” template), we can configure the Cloud Storage settings to point to Pachyderm, using the Pachyderm Storage Type.
2. Configure Source and Target Storage #
Selecting Cloud Storage from the Label Studio settings will allow us to add Source and Target Storage sync our data with.
First, let’s create two data repositories in Pachyderm for source and target storage. The source will be where we pull our unlabeled data from, and our target storage is where we’ll write our labels.
pachctl create repo images
pachctl put file images@master:liberty.png -f http://imgur.com/46Q8nDz.png
pachctl create repo labels
Next, we can add Pachyderm as our source and target storages by configuring them in the Label Studio Settings as shown below:
Source Storage #
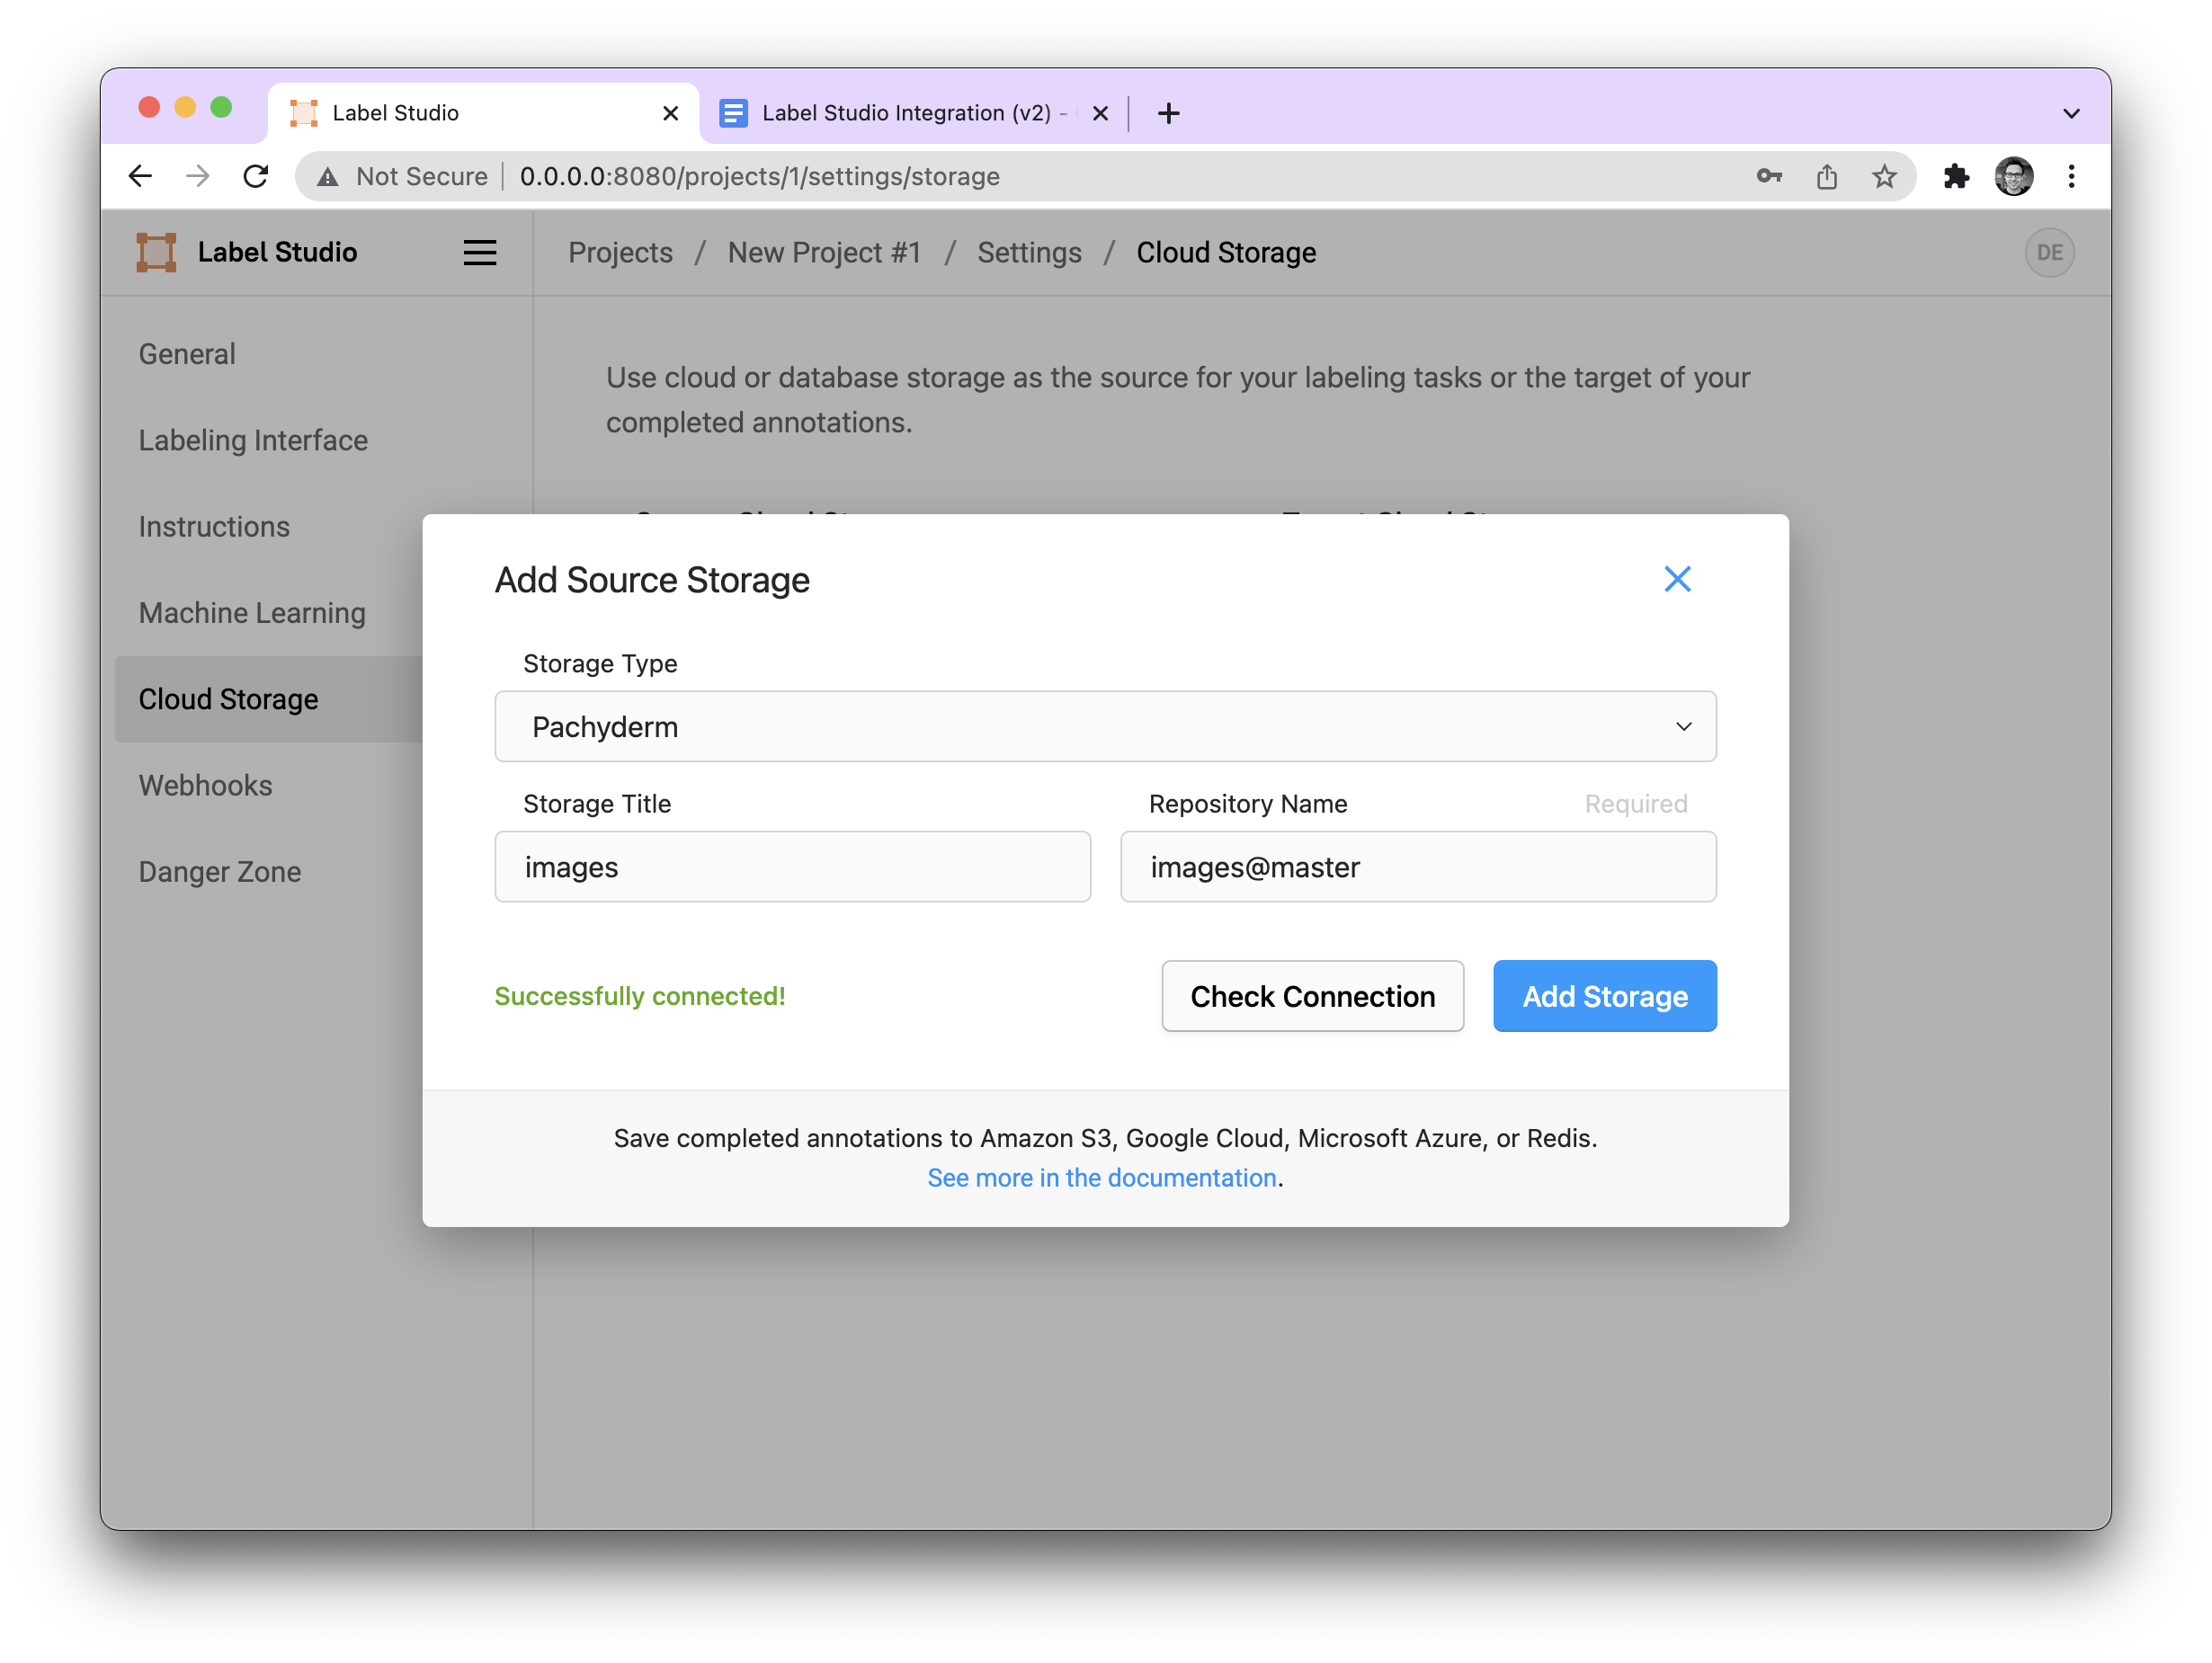
First, we will select Pachyderm as our storage type. The “Storage Title” will be the mounted directory name in the Label Studio container. In general, you shouldn’t have to worry about this very much, it’s mainly used as a way to keep track of things, should you have many source repos. The Repository Name will be the name and branch of our repo where we should pull our data from. Here, for example, images@master.
We can check the connection to make sure it is correct by pressing the “Check Connection” button and then once it is saved, we can sync our data from the source storage. When sync all of the data from that branch of the repo is downloaded into the Label Studio container.
Note: This is a one time operation, so we must press this button whenever we want to sync new examples.
Target Storage #
Configuring our target storage is roughly the same as our source storage. We configure the title and repo name.
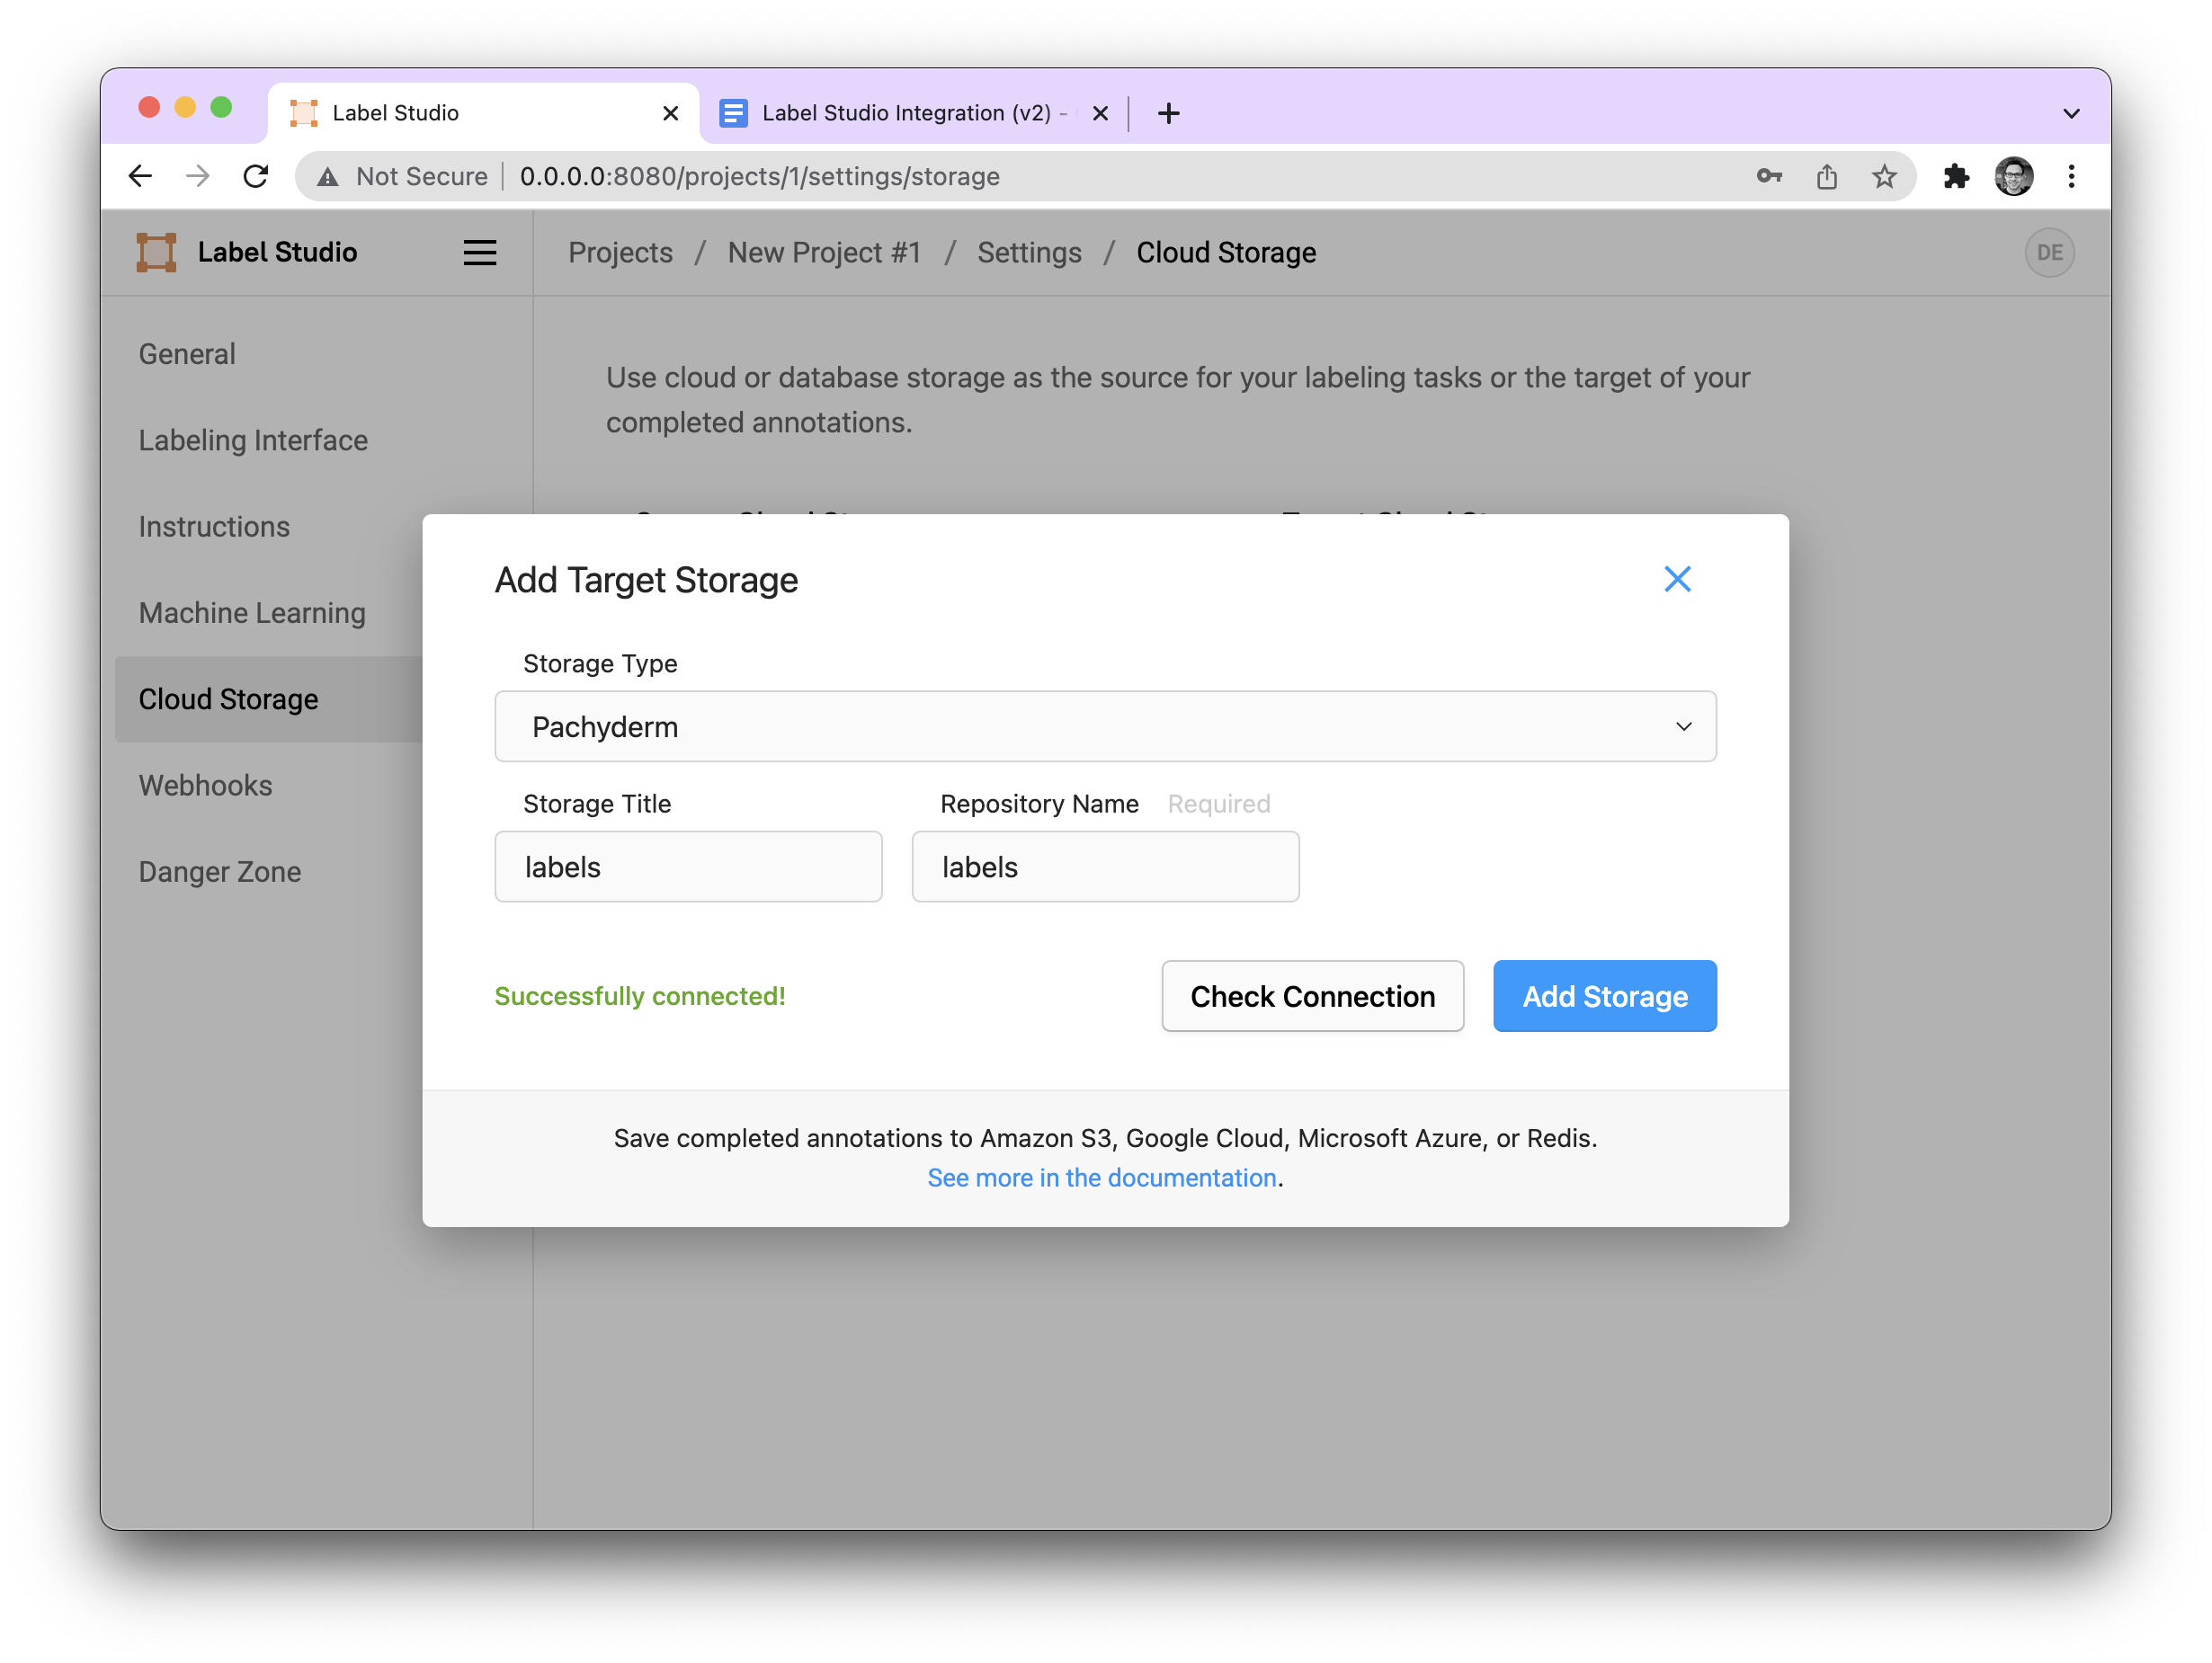
However, with Target Storage, the “sync storage” button has two roles:
- When it is pressed the first time, the repository is mounted, but no data is transferred. This is necessary to have a place to accumulate our annotations. (Think of it as a staging area for an upcoming commit.)
- The second time it is pressed, it commits all files that have been labeled to the Pachyderm repository (in our case
labels@master).
Note: In the image we only show labels but under the hood the code defaults to master if no other branch if provided. This is also the case with Source Storage.
This functionality is very beneficial because it means that we can have a single commit that contains all of our annotations instead of a commit per annotation, improving the speed of our data labeling.
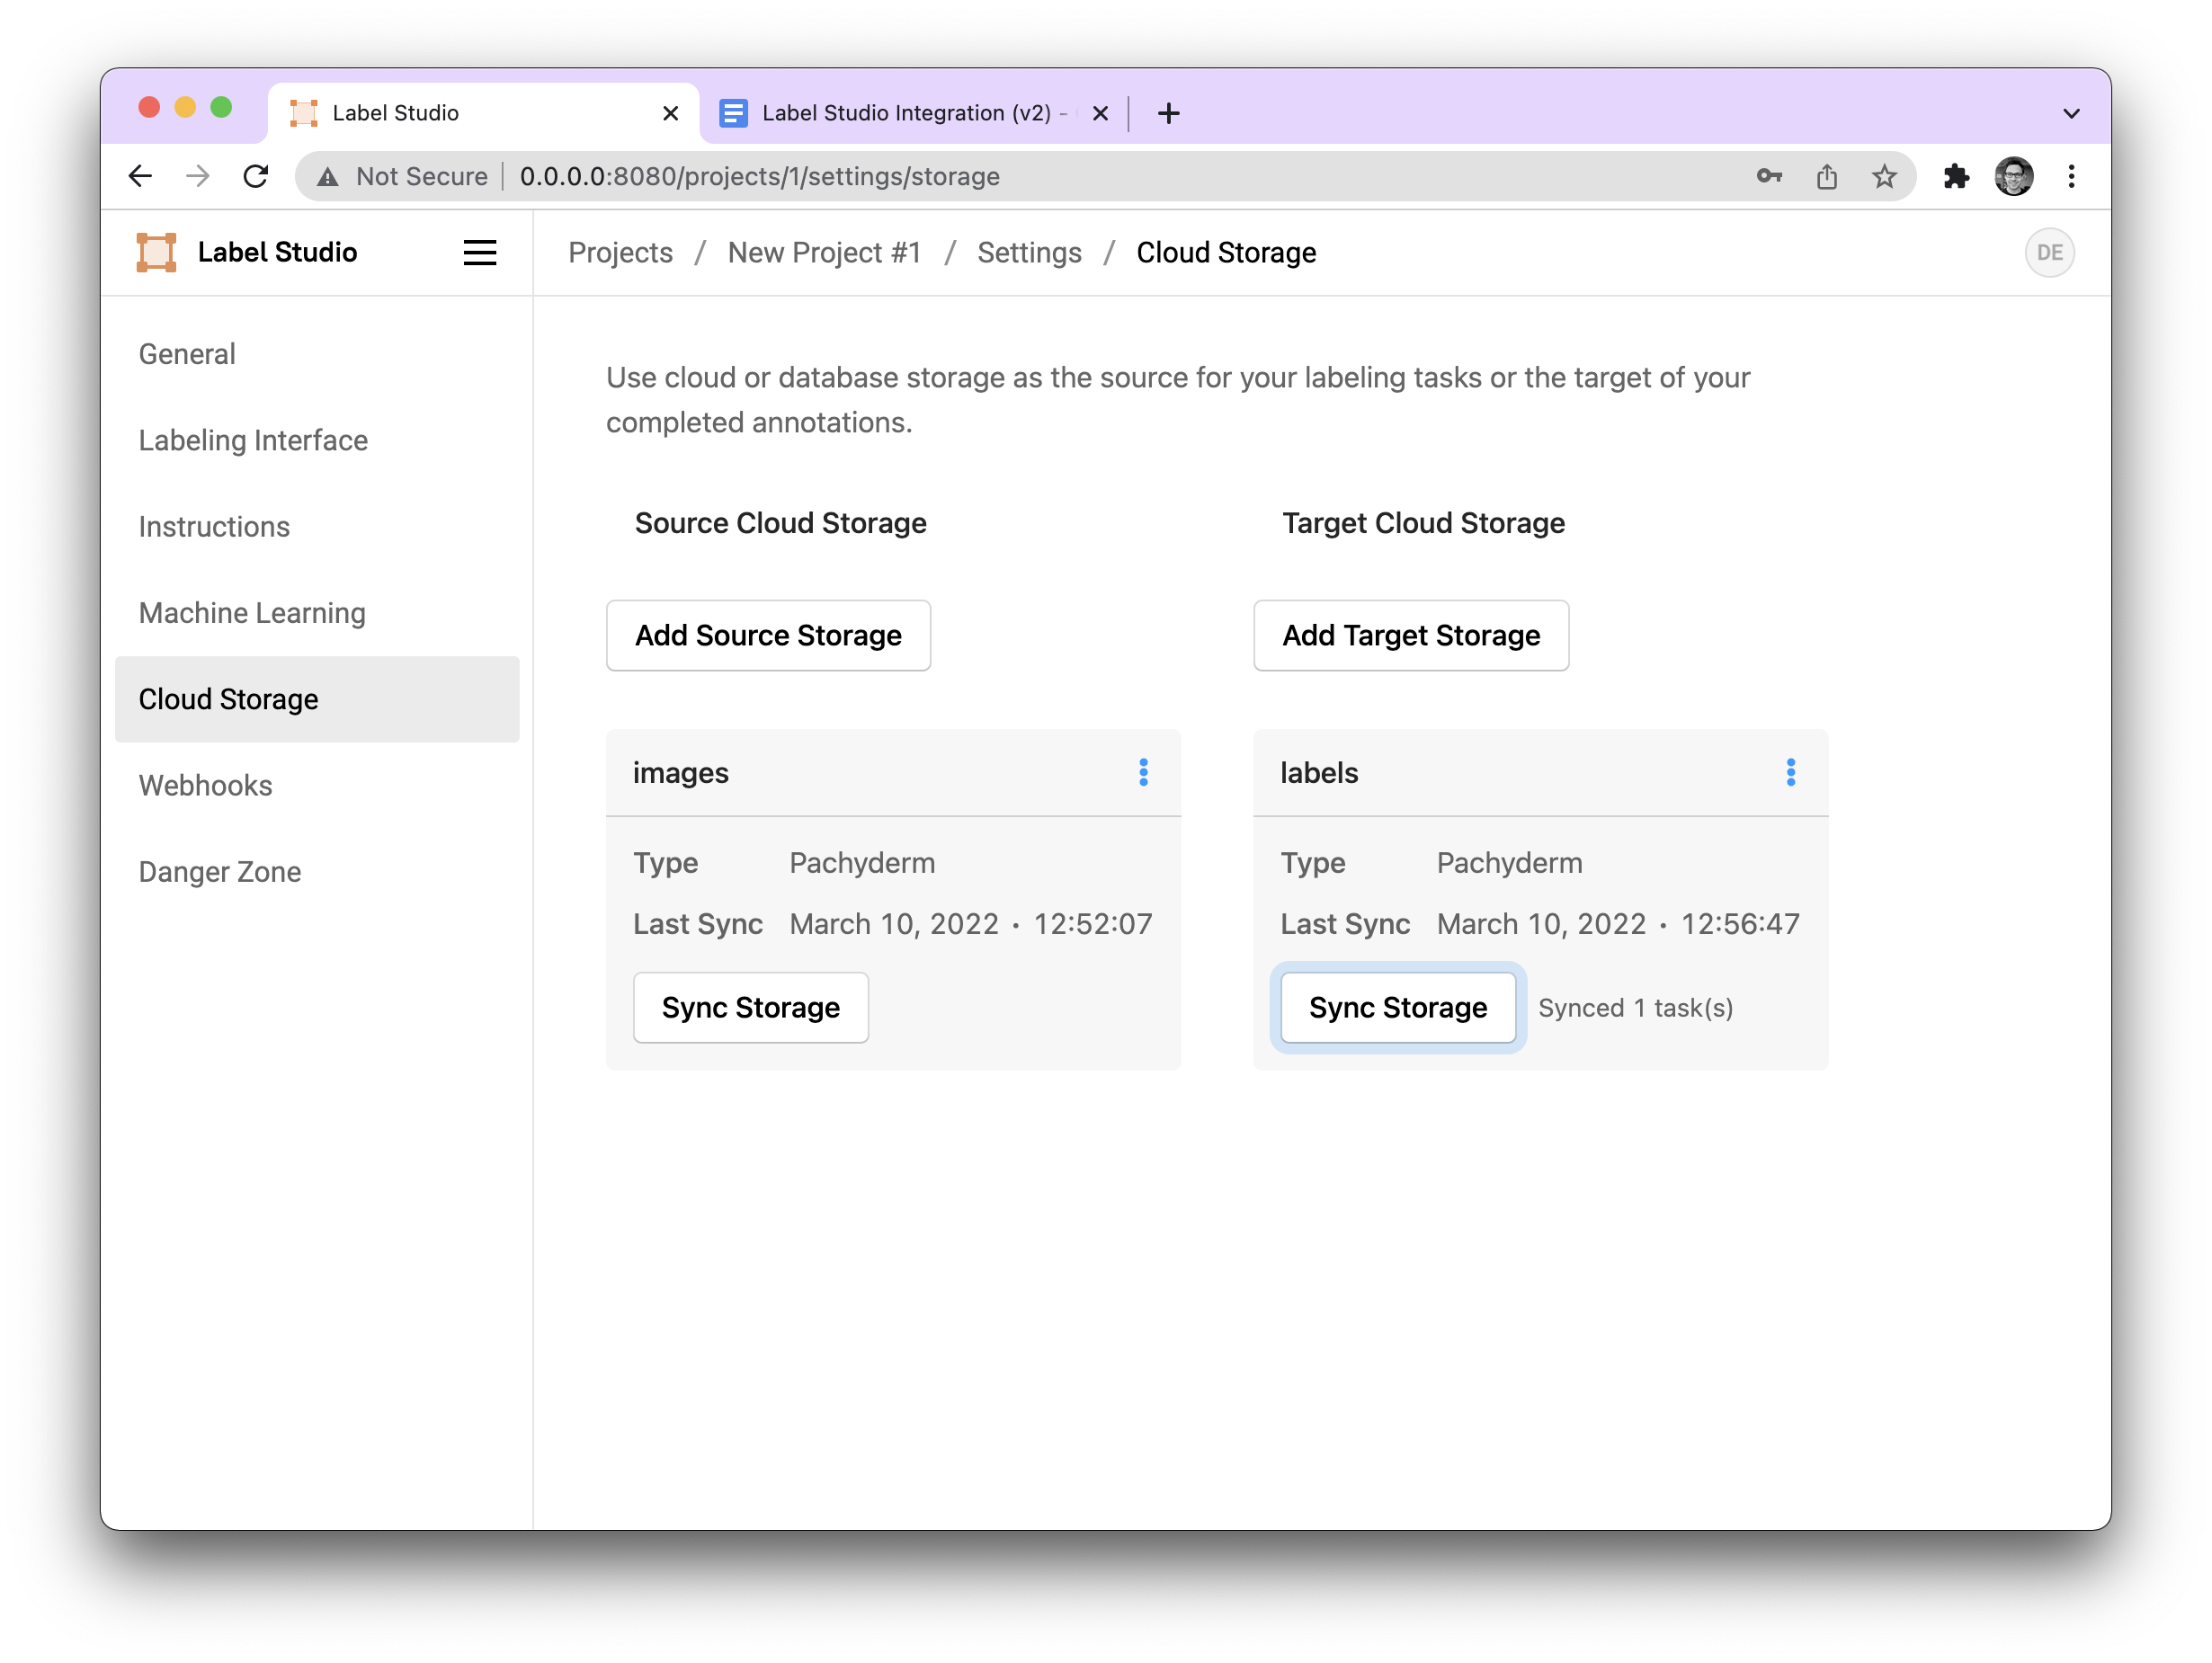
Once configured, our storage should look like this:

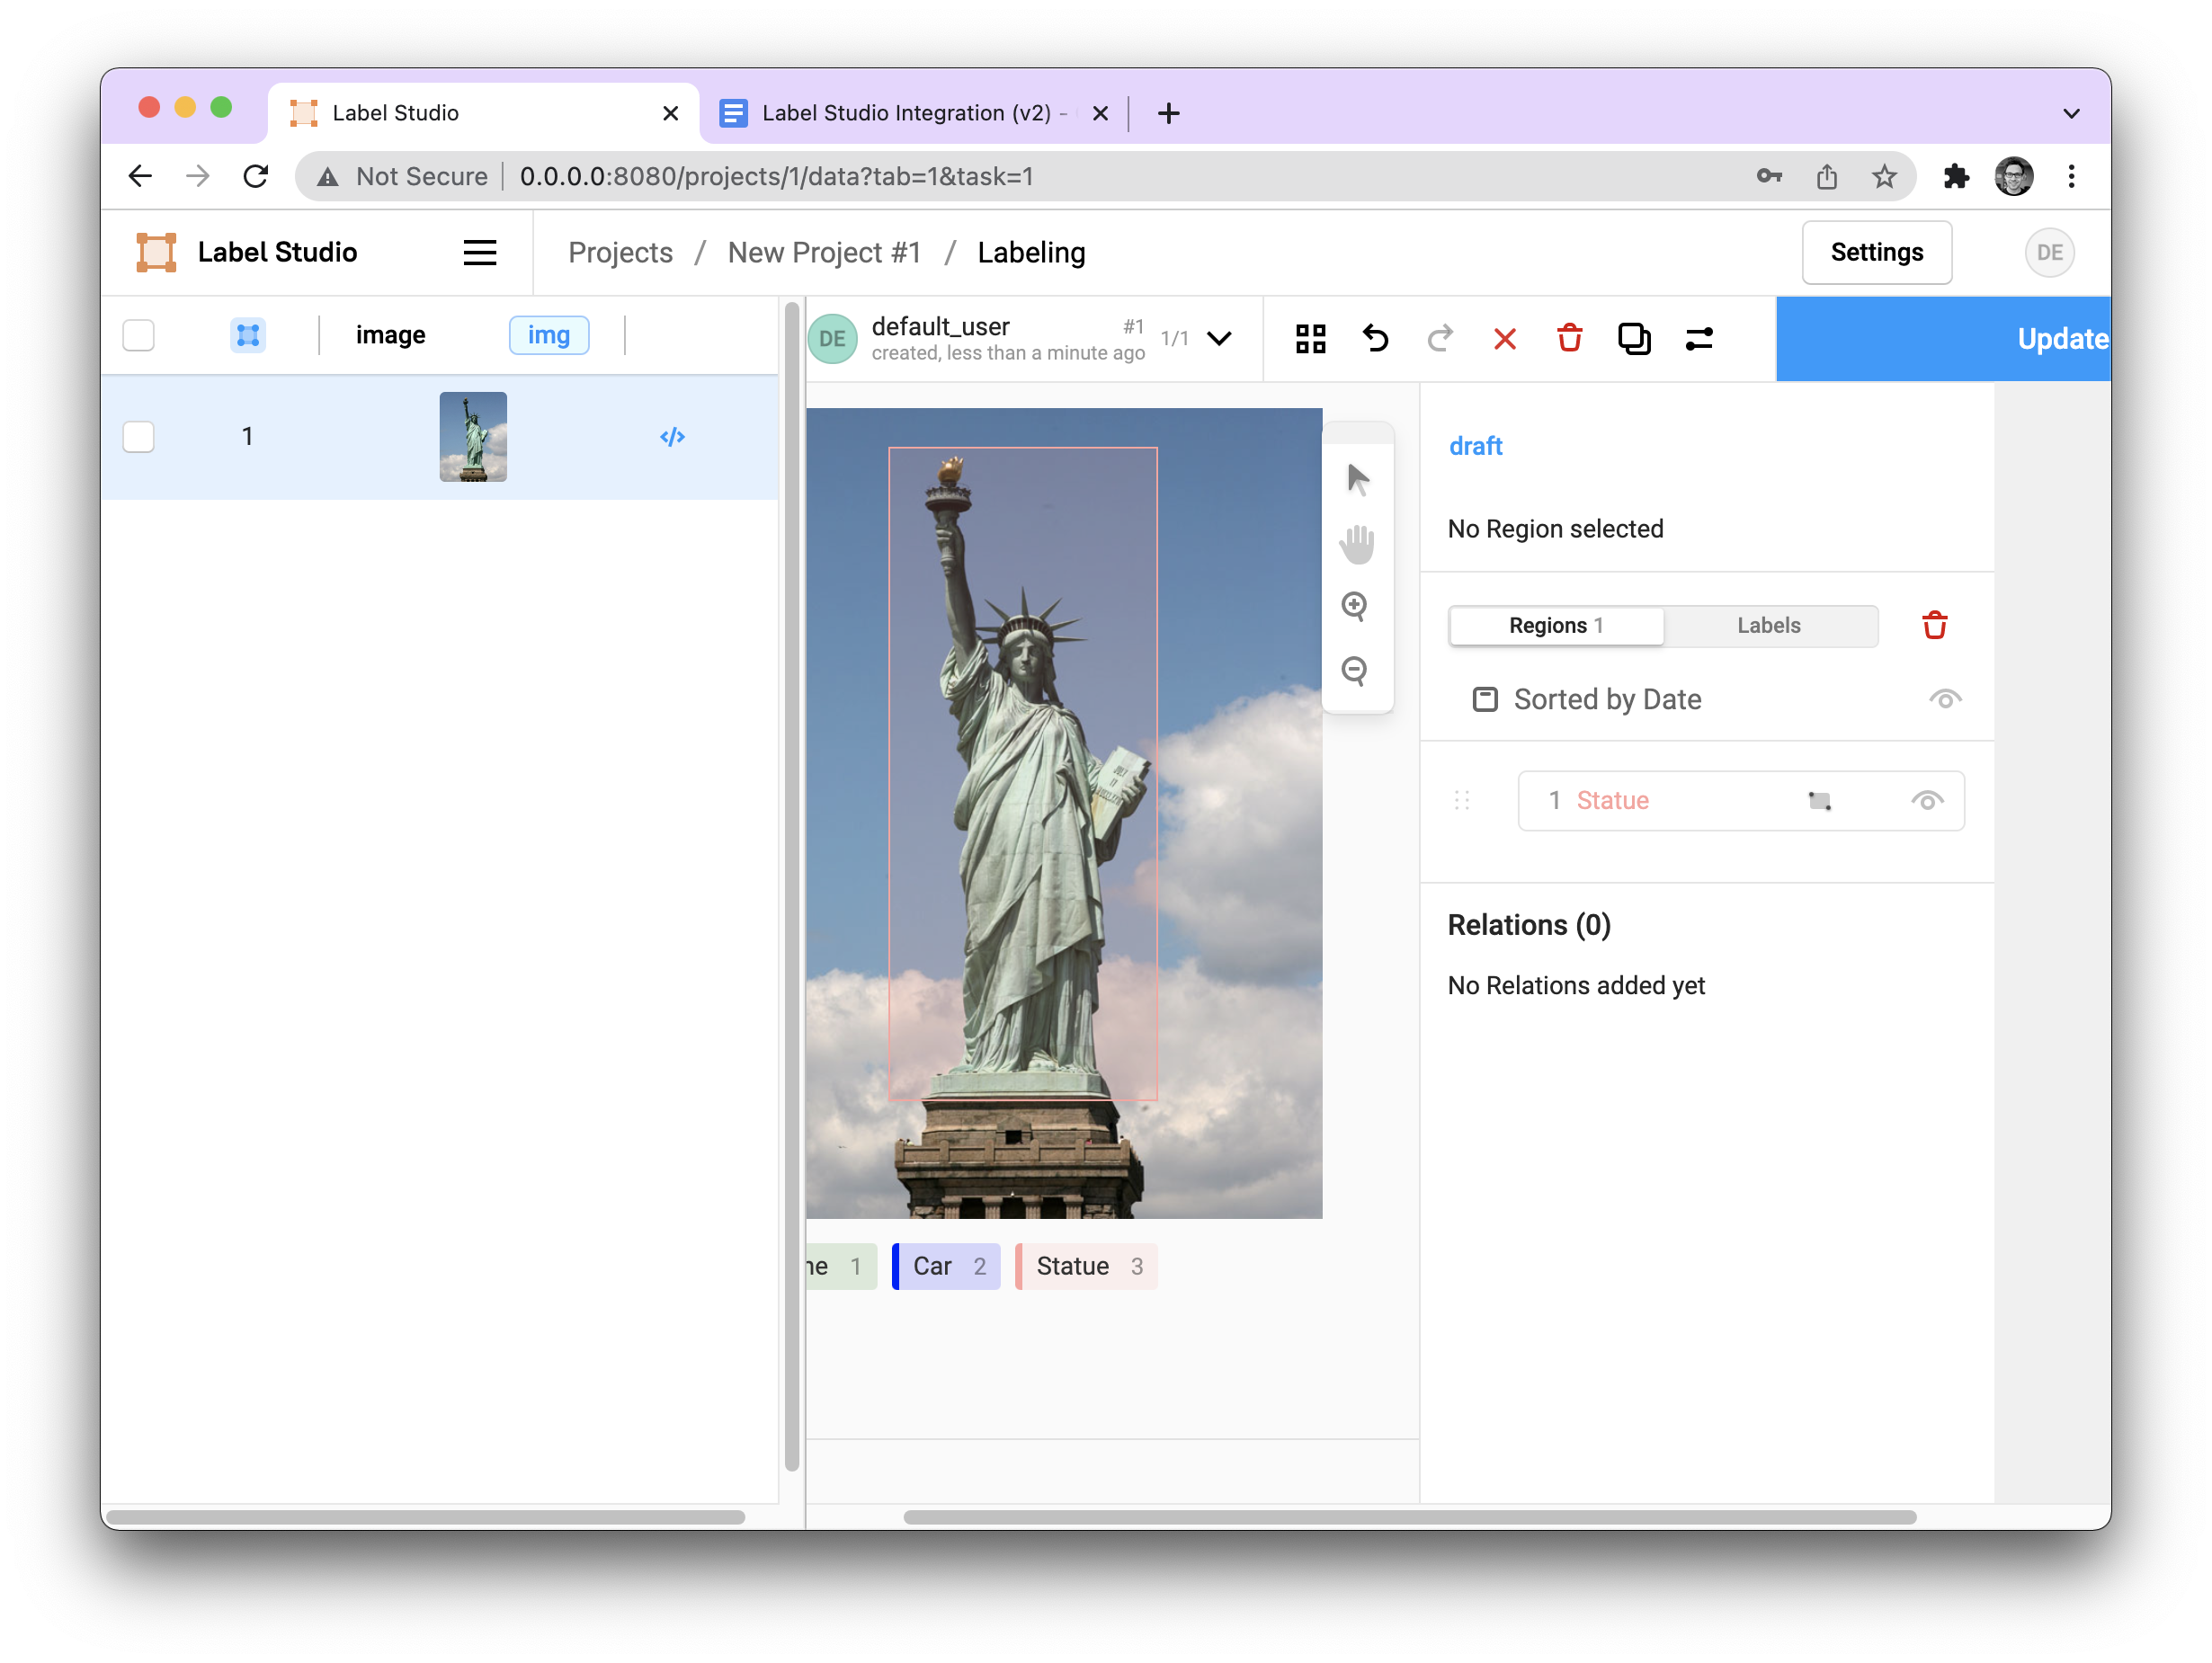
And when we move to our labeling environment, we see our example image present.
Commit our Annotations to Pachyderm #
After we have annotated our image data, we can commit all of our annotations to Pachyderm.
To do this we navigate back to Cloud Storage in our settings, and press the Sync Storage button on our Target Storage (labels@master). Under the hood, this will unmount the repo (committing the data) and then remount it again with the newest version of the branch. After the data is committed, it should look like the following:
In Pachyderm, we can verify that our data was committed by running:
$ pachctl list file labels@master
NAME    TYPE SIZE
/1.json file 1.228KiB
Building the LS Docker image from scratch #
If you want to build the Label Studio docker image from scratch with the Pachyderm cloud storage backend, you can run the following:
$ git clone https://github.com/pachyderm/label-studio.git
$ cd label-studio
$ git checkout -b pachyderm
$ docker build -t jimmywhitaker/label-studio:pach2.2-ls1.4v3 .