
Before You Start #
- You must have an Enterprise Server set up.
- This guide assumes you are using the embedded proxy.
- This guide uses Auth0 as an example; if you do not have an Auth0 account, sign up for one and create your Pool of Users.
1. Register With Your IdP #
- Log in to your Auth0 account.
- In Applications, click Create Application.
- Type the name of your application, such as Pachyderm.
- In the application type, select Regular Web Application.
- Click Create.
- Go to the application settings.
- Scroll down to Application URIs.
- In the Allowed Callback URLs, add the Pachyderm callback link in the following format:
# Dex's issuer URL + "/callback"
http(s)://<insert-external-ip-or-dns-name>/dex/callback
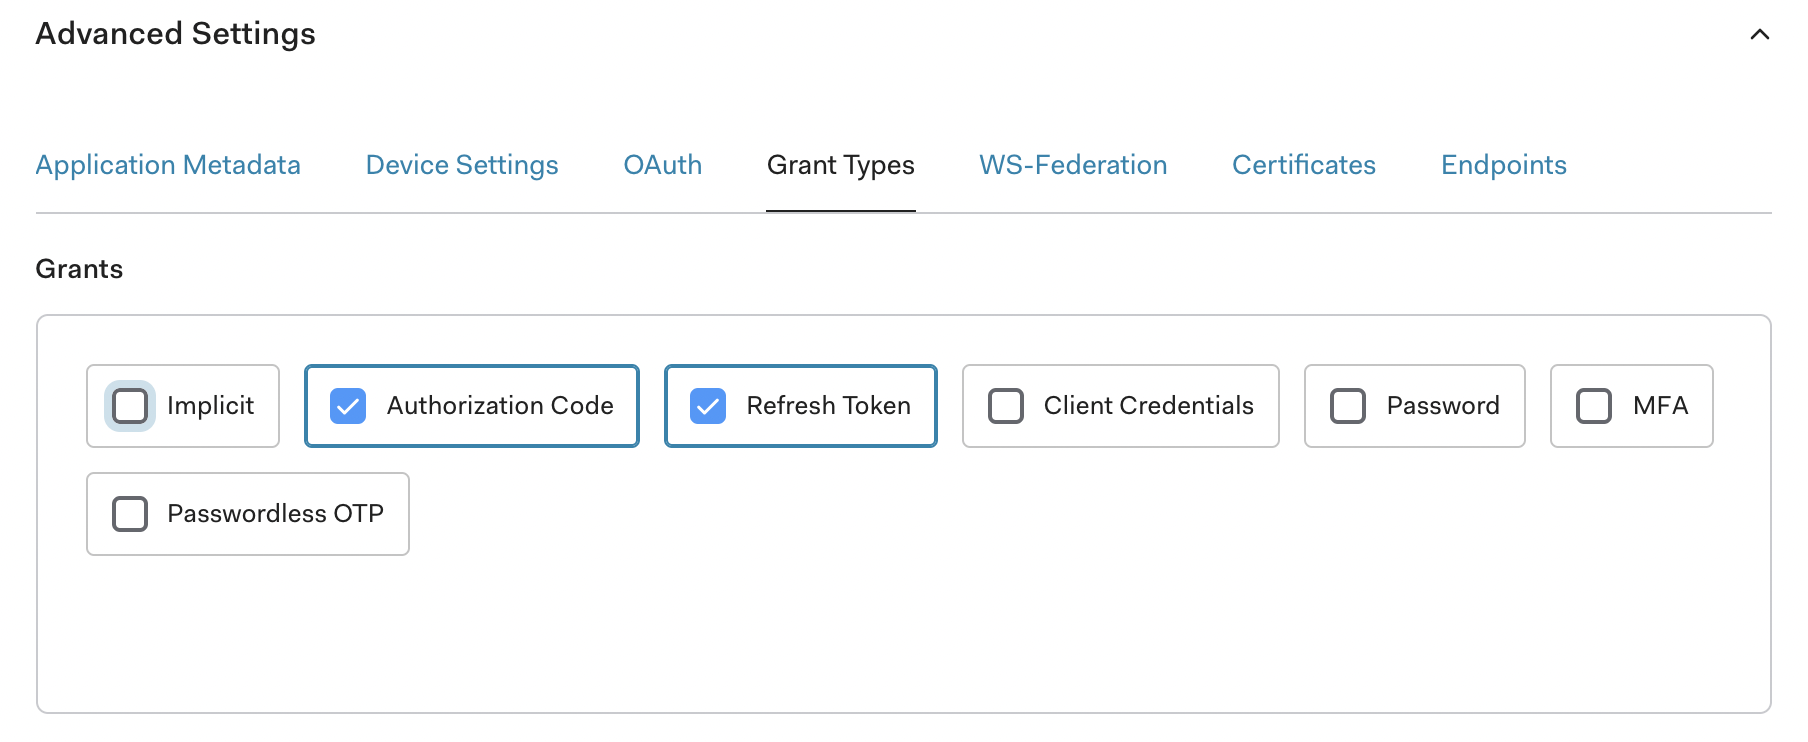
- Scroll down to Show Advanced Settings.
- Select Grant Types.
- Verify that Authorization Code and Refresh Token are selected.
2. Set Up Connector #
- Create a JSON or YAML connector config file that matches your IdP.
Syntax:
{
"type": "oidc",
"id": "auth0",
"name": "Auth0",
"version": 1,
"config":{
  "issuer": "https://dev-k34x5yjn.us.auth0.com/",
  "clientID": "hegmOc5rTotLPu5ByRDXOvBAzgs3wuw5",
  "clientSecret": "7xk8O71Uhp5T-bJp_aP2Squwlh4zZTJs65URPma-2UT7n1iigDaMUD9ArhUR-2aL",
  "redirectURI": "http(s)://<insert-external-ip-or-dns-name>/dex/callback",
  "insecureEnableGroups": true,
  "insecureSkipEmailVerified": true,
  "insecureSkipIssuerCallbackDomainCheck": false,
  "forwardedLoginParams": ["login_hint"]
  }
} type: oidc
id: auth0
name: Auth0
version: 1
config:
issuer: https://dev-k34x5yjn.us.auth0.com/
clientID: hegmOc5rTotLPu5ByRDXOvBAzgs3wuw5
clientSecret: 7xk8O71Uhp5T-bJp_aP2Squwlh4zZTJs65URPma-2UT7n1iigDaMUD9ArhUR-2aL
redirectURI: http(s)://<insert-external-ip-or-dns-name>/dex/callback
insecureEnableGroups: true
insecureSkipEmailVerified: true
insecureSkipIssuerCallbackDomainCheck: false,
forwardedLoginParams:
- login_hintℹ️
Note that Pachyderm’s YAML format is a simplified version of Dex’s sample config.
- Update the following attributes:
| Attribute | Description |
|---|---|
| id | The unique identifier of your connector (string). |
| name | Its full name (string). |
| type | The type of connector. (oidc, saml). |
| version | The version of your connector (integer - default to 0 when creating a new connector) |
| issuer | The domain of your application (here in Auth0). For example, https://dev-k34x5yjn.us.auth0.com/. Note the trailing slash. |
| client_id | The Pachyderm Client ID (here in Auth0). The client ID consists of alphanumeric characters and can be found on the application |
| settings page. | |
| client_secret | The Pachyderm client secret (here in Auth0) located on the application settings page. |
| redirect_uri | This parameter should match what you have added to Allowed Callback URLs when registering Pachyderm on your IdP website. |
- Open your Helm
values.ymlfile. - Find the oidc.upstreamIDPs section.
- Input your connector info; Pachyderm stores this value in the platform secret
pachyderm-identityin the keyupstream-idps.
stringData:
upstream-idps: |
    - type: github
    id: github
    name: GitHub
    jsonConfig: >-
        {
        "clientID": "xxx",
        "clientSecret": "xxx",
        "redirectURI": "https://pach.pachdemo.cloud/dex/callback",
        "loadAllGroups": true
        }
Alternatively, you can create a secret containing your dex connectors (Key: upstream-idps) and reference its name in the field oidc.upstreamIDPsSecretName.
3. Login #
The users registered with your IdP are now ready to Log in to Pachyderm
Considerations #
Ingress #
When using an ingress:
redirect_urimust be changed to point tohttps://domain-name/dex/callback. (Note the additional /dex/)- TLS requires all non-localhost redirectURIs to be HTTPS.
- AZURE USERS:
- You must use TLS when deploying on Azure.
- When using Azure Active Directory, add the following to the oidc config:
"config":{
    "claimMapping": {
        "email": "preferred_username"
    }
}