
Before You Start #
- Install Pachyderm either locally our within the cloud.
- Install Pachyderm Shell.
- Join our Slack Community so you can ask any questions you may have!
Context #
Pachyderm creates a Kubernetes cluster that you interact with using either the pachctl CLI or through Console, a GUI.
- pachctl is great for users already experienced with using a CLI.
- Console is great for beginners and helps with visualizing relationships between projects, repos, and pipelines.
Within the cluster, you can create projects that contain repos and pipelines. Pipelines can be single-stage or multi-stage; multi-stage pipelines are commonly referred to as DAGs.
Tutorial: Image processing with OpenCV #
In this tutorial you’ll create an image edge detection pipeline that processes new data as it is added and outputs the results.
1. Create a Project #
To keep our work organized, we’re going to create a project named openCV and set it to our currently active context.
pachctl create project openCV
pachctl config update context --project openCV
You can always check to confirm which project has been set to your context by running the following commands:
# prints current context name (local)
pachctl config get active-context

# prints local's context details
pachctl config get context local

# {
#   "source": "IMPORTED",
#   "cluster_name": "docker-desktop",
#   "auth_info": "docker-desktop",
#   "cluster_deployment_id": "dev",
#   "project": "openCV"
# }- Open a tab in your browser and go to localhost.
- Select Create Project.
- Provide details for the following values:
- Name
- Description
- Select Create.
2. Create a Repo #
Repos should be dedicated to a single source of data such as log messages from a particular service, a users table, or training data.
pachctl create repo imagesYou can verify that the repository was created by running the following command:
pachctl list repo

# NAME   CREATED       SIZE (MASTER) ACCESS LEVEL
# images 4 seconds ago ≤ 0B [repoOwner]- In Console, select View Project.
- Select Create Your First Repo.
- Provide details for the following values:
- Name
- Description
- Select Create.
3. Add Data #
In Pachyderm, you write data to an explicit commit. Commits are immutable
snapshots of your data which give Pachyderm its version control properties.
You can add, remove, or update files in a given commit.
We’re going to use the pachctl put file command, along with the -f flag, to upload an image.
pachctl put file images@master:liberty.png -f https://github.com/pachyderm/docs-content/blob/main/images/opencv/liberty.jpg?raw=truepachctl put file automatically starts and finishes a commit for you so you can add files
more easily.
If you want to add many files over a period of time, you can do pachctl start commit and pachctl finish commit yourself.
You can confirm the commit using the following command:
pachctl list commit images

# REPO          BRANCH COMMIT                           FINISHED       SIZE     ORIGIN DESCRIPTION
# openCV/images master 37559e89ed0c4a0cb354649524050851 10 seconds ago 57.27KiB USER
You can also view the filename in the commit using the following command:
pachctl list file images@master

# NAME         TYPE SIZE
# /liberty.png file 57.27KiB- From your Project’s DAG view in console, select your repo.
- Select the upload icon from the slideout menu.
- Complete one of the following:
- Provide the path of the file on your local machine.
- Select Browse Files and choose the file from your local machine.
- Drag-and-drop the file.
- Select Done.
Bonus: View Image #
You can view the files you’ve uploaded in the Console or in your Terminal.
In Terminal #
pachctl get file images@master:liberty.png | open -f -a Preview.apppachctl get file images@master:liberty.png | displayIn Console #
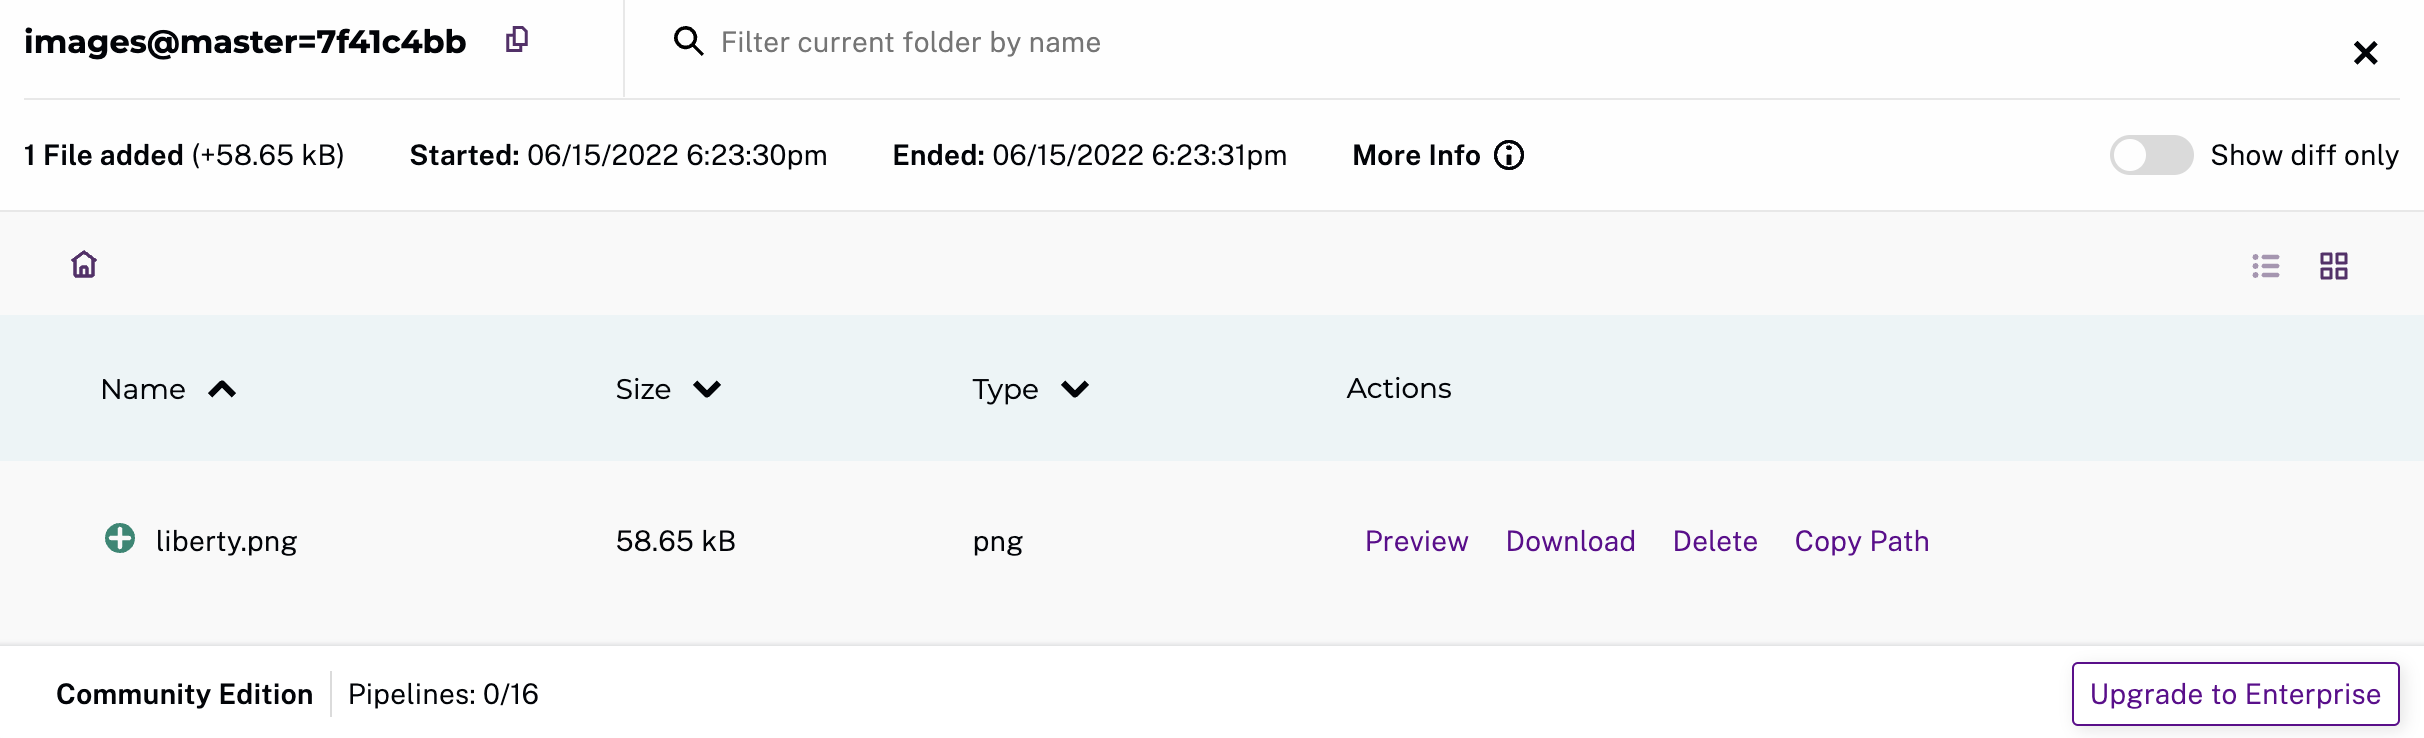
In your Console, click on the images repo to visualize its commit and inspect its file:
4. Create a Pipeline #
Now that you have some data in your repo, it is time to do something with it using a pipeline.
Pipelines process data and are defined using a JSON pipeline specification. For this tutorial, we’ve already created the spec for you.
Review Pipeline Spec #
Take a moment to review the details of the provided pipeline spec so that you’ll know how to create one on your own in the future.
{
  // The `pipeline` section contains a `name` for identification; this name is also used to create a corresponding output repo.
  "pipeline": {
    "name": "edges"
  },
  "description": "A pipeline that performs image edge detection by using the OpenCV library.",
  // The `transform` section allows you to specify the docker `image` you want to use (`pachyderm/opencv:1.0`)and the `cmd` that defines the entry point (`edges.py`).
  "transform": {
    "cmd": [ "python3", "/edges.py" ],
    "image": "pachyderm/opencv:1.0"
  },
  // The input section specifies repos visible to the running pipeline, and how to process the data from the repos.
  // Commits to these repos trigger the pipeline to create new processing jobs. In this case, `images` is the repo, and `/*` is the glob pattern.
  "input": {
    "pfs": {
      "repo": "images",
      // The glob pattern defines how the input data will be transformed into datum if you want to distribute computation. `/*` means that each file can be processed individually.
      "glob": "/*"
    }
  }
}
The following extract is the Python User Code run in this pipeline:
import cv2
import numpy as np
from matplotlib import pyplot as plt
import os

# make_edges reads an image from /pfs/images and outputs the result of running
# edge detection on that image to /pfs/out. Note that /pfs/images and
# /pfs/out are special directories that Pachyderm injects into the container.
def make_edges(image):
   img = cv2.imread(image)
   tail = os.path.split(image)[1]
   edges = cv2.Canny(img,100,200)
   plt.imsave(os.path.join("/pfs/out", os.path.splitext(tail)[0]+'.png'), edges, cmap = 'gray')

# walk /pfs/images and call make_edges on every file found
for dirpath, dirs, files in os.walk("/pfs/images"):
   for file in files:
       make_edges(os.path.join(dirpath, file))
The code simply walks over all the images in /pfs/images, performs edge detection, and writes the result to /pfs/out.
/pfs/imagesand/pfs/outare special local directories that Pachyderm creates within the container automatically.- Input data is stored in
/pfs/<input_repo_name>.
Your code must write out to /pfs/out (see the function make_edges(image) above). Pachyderm gathers data written to /pfs/out, versions it, and maps it to the pipeline’s output repo of the same name.
Now, let’s create the pipeline in Pachyderm:
pachctl create pipeline -f https://raw.githubusercontent.com/pachyderm/pachyderm/2.6.x/examples/opencv/edges.jsonAgain, check the end result in your Console:
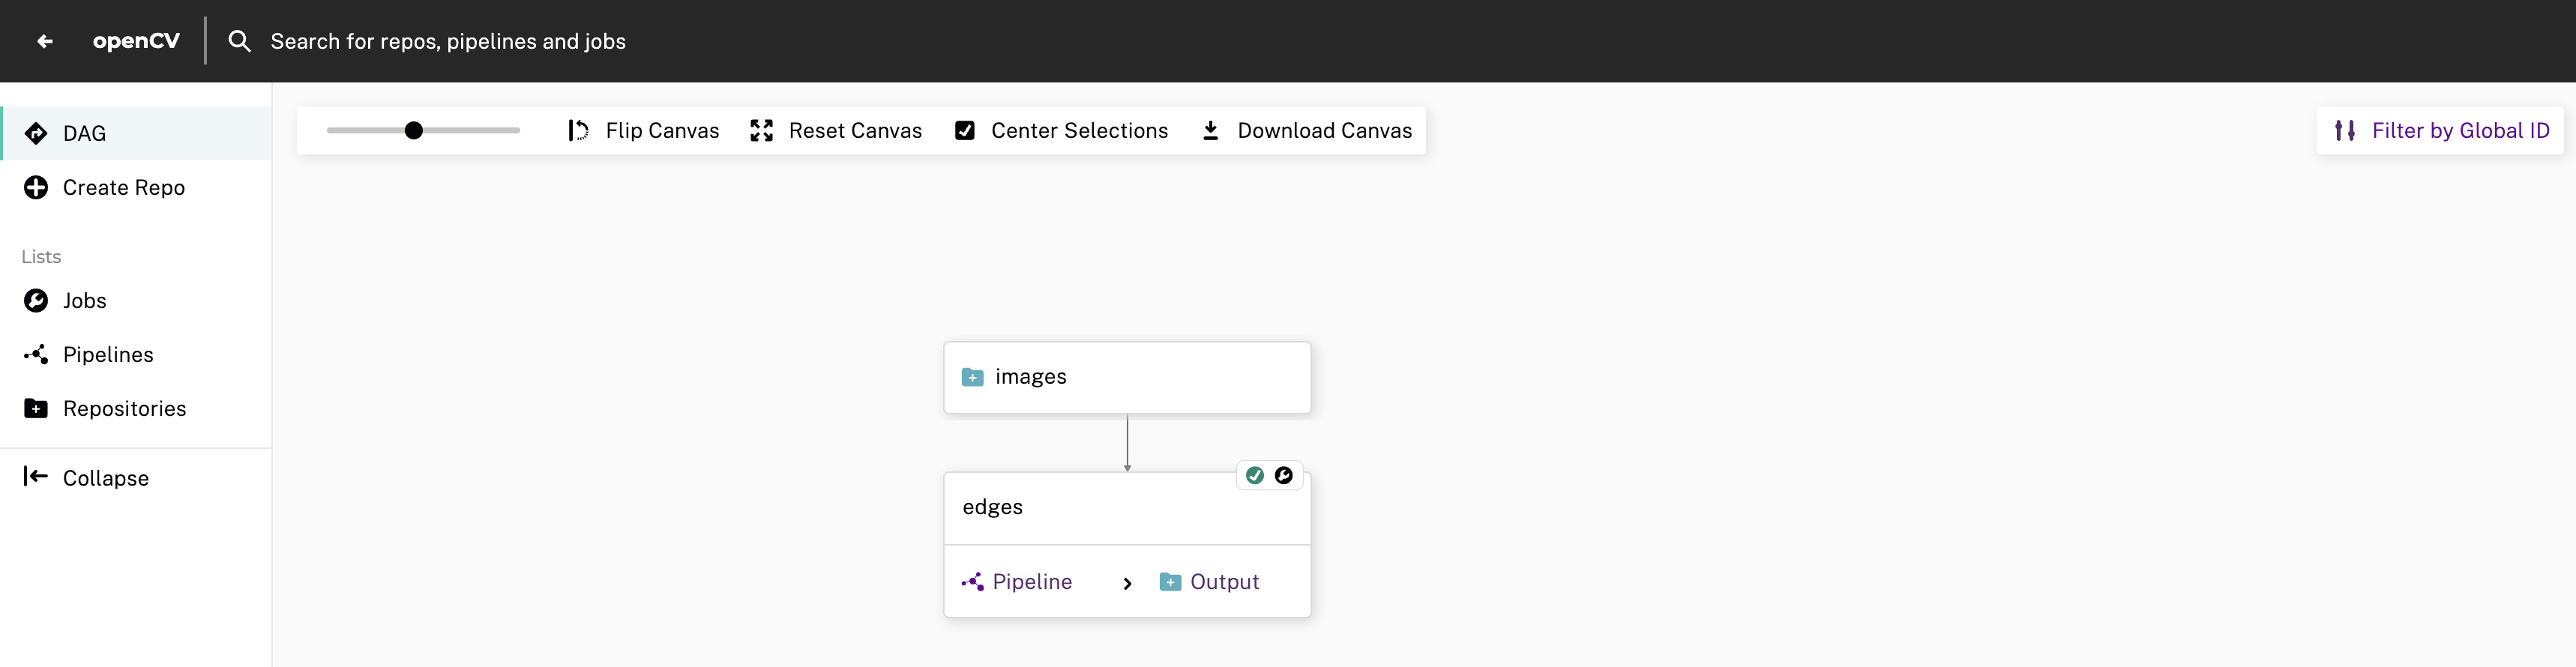
What Happens When You Create a Pipeline #
When you create a pipeline, Pachyderm transforms all current and future data added to your input repo using your user code. This process is known as a job. The initial job downloads the specified Docker image that is used for all future jobs.
- View the job:
pachctl list job

# ID                               SUBJOBS PROGRESS CREATED       MODIFIED
# 23378d899d3d45738f55df3809841145 1 ▇▇▇▇▇▇▇▇ 5 seconds ago 5 seconds ago- Check the state of your pipeline:
pachctl list pipeline

# NAME  VERSION INPUT     CREATED       STATE / LAST JOB  DESCRIPTION
# edges 1 images:/* 2 minutes ago running / success A pipeline that performs image edge detection by using the OpenCV library.- List your repositories:
pachctl list repo

# NAME   CREATED        SIZE (MASTER) ACCESS LEVEL
# edges  10 minutes ago ≤ 22.22KiB    [repoOwner]  Output repo for pipeline edges.
# images 3 hours ago    ≤ 57.27KiB    [repoOwner]
Reading the Output #
We can view the output data from the edges repo in the same fashion
that we viewed the input data.
pachctl get file edges@master:liberty.png | open -f -a Preview.apppachctl get file edges@master:liberty.png | display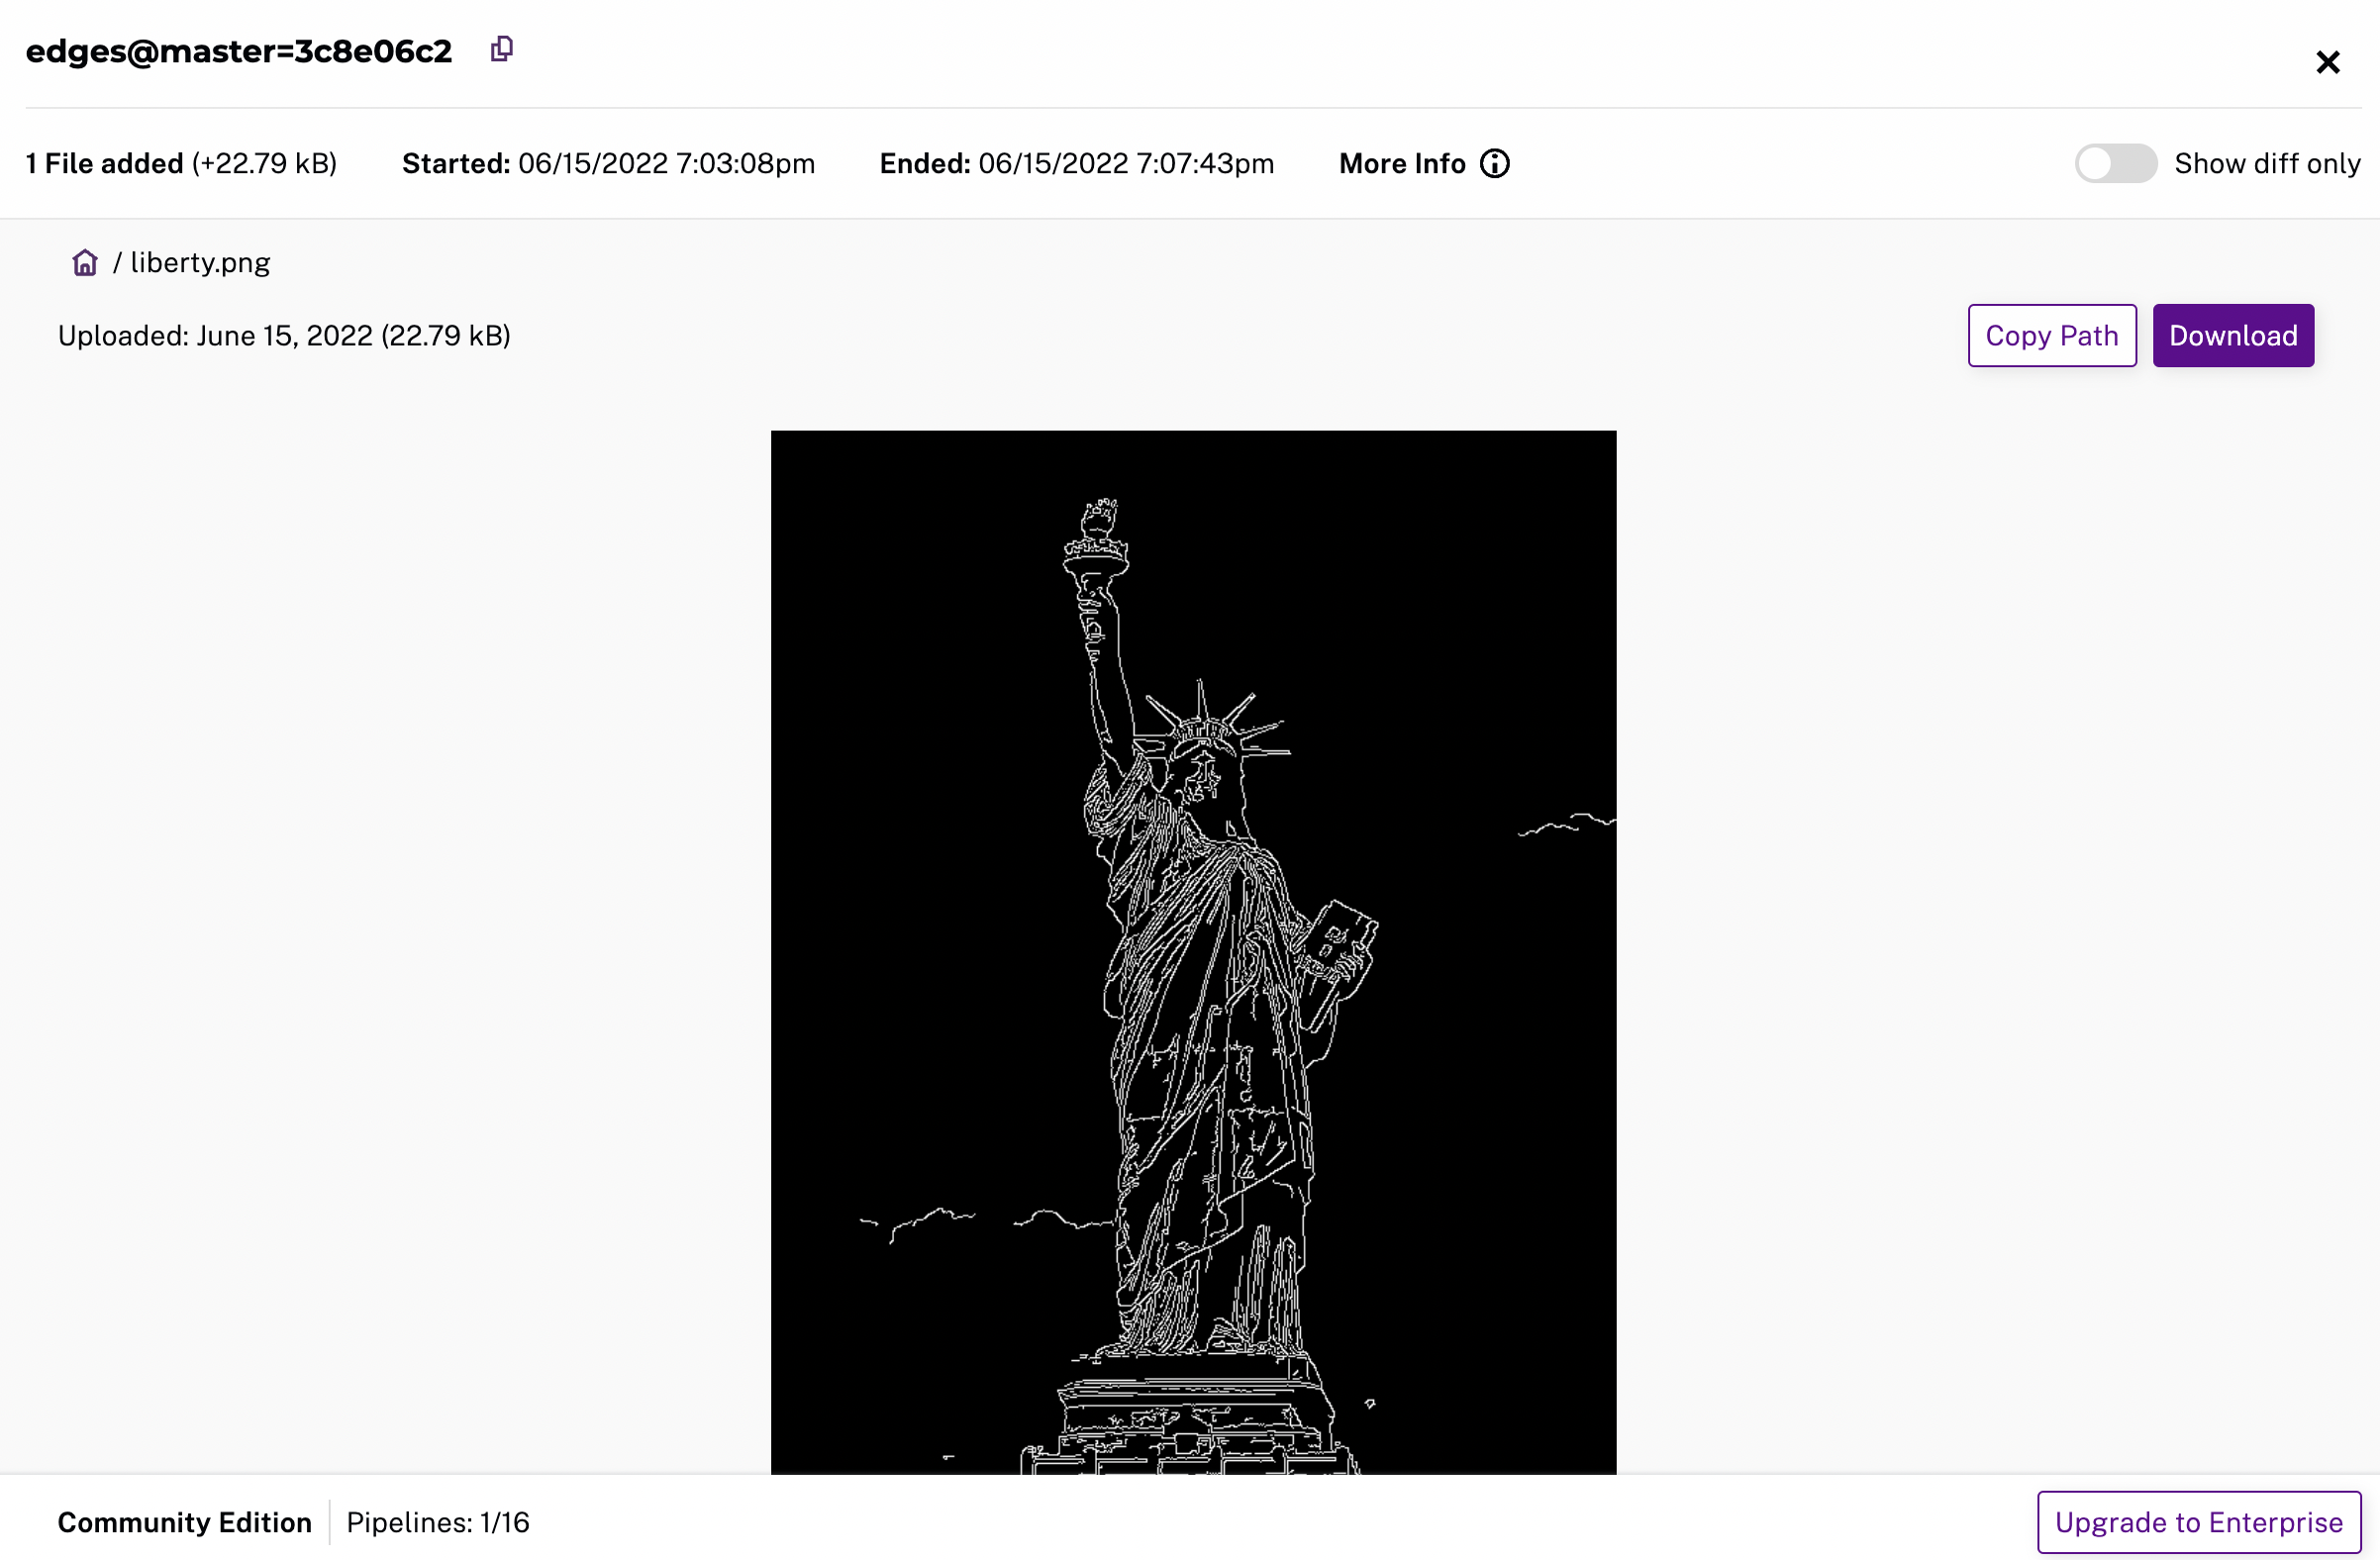
Processing More Data #
- Create two new commits:
pachctl put file images@master:AT-AT.png -f https://github.com/pachyderm/docs-content/blob/main/images/opencv/robot.jpg
pachctl put file images@master:kitten.png -f https://github.com/pachyderm/docs-content/blob/main/images/opencv/kitten.jpg- View the list of jobs that have started:
pachctl list job

# ID                               SUBJOBS PROGRESS CREATED        MODIFIED
# 1c1a9d7d36944eabb4f6f14ebca25bf1 1       ▇▇▇▇▇▇▇▇ 31 seconds ago 31 seconds ago
# fe5c4f70ac4347fd9c5934f0a9c44651 1       ▇▇▇▇▇▇▇▇ 47 seconds ago 47 seconds ago
# 23378d899d3d45738f55df3809841145 1 ▇▇▇▇▇▇▇▇ 12 minutes ago 12 minutes ago- View the output data:
pachctl get file edges@master:AT-AT.png | open -f -a Preview.app
pachctl get file edges@master:kitten.png | open -f -a Preview.app
pachctl get file edges@master:AT-AT.png | display
pachctl get file edges@master:kitten.png | display5. Create a DAG #
Currently, we’ve only set up a single-stage pipeline. Let’s create a multi-stage pipeline (also known as a DAG) by adding a montage pipeline that takes our both original and edge-detected images and arranges them into a single montage of images:

Below is the pipeline spec for this new pipeline:
{
  "pipeline": {
    "name": "montage"
  },
  "description": "A pipeline that combines images from the `images` and `edges` repositories into a montage.",
  "input": {
    "cross": [ {
      "pfs": {
        "glob": "/",
        "repo": "images"
      }
    },
    {
      "pfs": {
        "glob": "/",
        "repo": "edges"
      }
    } ]
  },
  "transform": {
    "cmd": [ "sh" ],
    "image": "v4tech/imagemagick",
    "stdin": [ "montage -shadow -background SkyBlue -geometry 300x300+2+2 $(find /pfs -type f | sort) /pfs/out/montage.png" ]
  }
}
This montage pipeline spec is similar to our edges pipeline except
for the following differences:
- We are using a different Docker image that
has
imagemagickinstalled. - We are executing a
shcommand withstdininstead of a python script in the pipeline’stransformsection. - We have multiple input data repositories (
imagesandedges).
In the montage pipeline we are combining our multiple input data
repositories using a cross pattern. This cross pattern creates a
single pairing of our input images with our edge detected images.
- Create the
montagepipeline:
pachctl create pipeline -f https://raw.githubusercontent.com/pachyderm/pachyderm/2.6.x/examples/opencv/montage.json- View the triggered jobs:
pachctl list job

#  ID                               SUBJOBS PROGRESS CREATED        MODIFIED
# 01e0c8040e18429daf7f67ce34c3a5d7 1       ▇▇▇▇▇▇▇▇ 11 seconds ago 11 seconds ago
# 1c1a9d7d36944eabb4f6f14ebca25bf1 1       ▇▇▇▇▇▇▇▇ 12 minutes ago 12 minutes ago
# fe5c4f70ac4347fd9c5934f0a9c44651 1       ▇▇▇▇▇▇▇▇ 12 minutes ago 12 minutes ago
# 23378d899d3d45738f55df3809841145 1 ▇▇▇▇▇▇▇▇ 24 minutes ago 24 minutes ago- View the generated montage image:
pachctl get file montage@master:montage.png | open -f -a Preview.app pachctl get file montage@master:montage.png | display